


Zdravím, chci se zeptat, jestli má někdo zkušenost s UV ochranou. Jak dlouho přibližně vydrží?
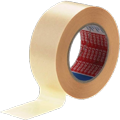
ROWAX Headlamp Renovation Kit
-
 Alza Days - Home Office

-
 Discounts for pets

-
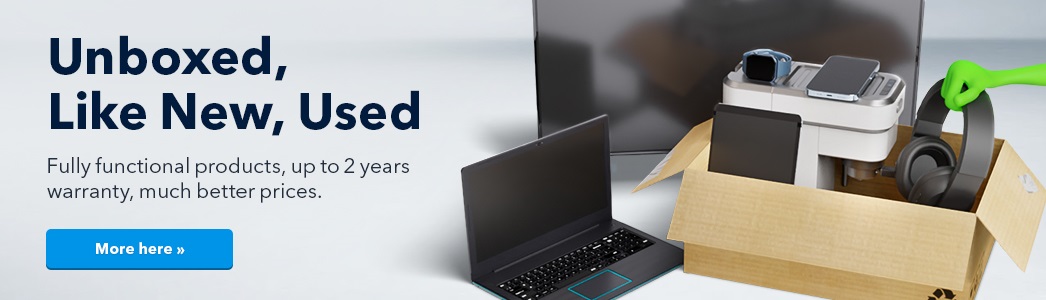
 Phones, Smart Watches, Tablets


-
 Computers and Laptops


-
 Gaming and Entertainment


-
 TV, Photo, Audio & Video


-
 Major Appliances


-
 Household and Personal Appliances


-
 Kitchen and Household Supplies


-
 House, Hobby and Garden


-
 Toys, for Kids and Babies


-
 Drugstore
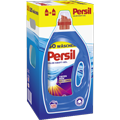
 Laundry DetergentsGels
Washing Powders
Capsules & Tablets
Fabric Softeners
Laundry Detergents
For Babies
Colour Protect Tissues
Laundry Fragrances
Laundry Starch
For Sportswear
Stain & Odour Removers
Water Softeners
Special Detergents
German
Laundry Whiteners
Washing Machine Cleaners
Tumble Dryer Products
Textile Dyes
Accessories


-
 Beauty


-
 Pet Supplies


-
 Sport and Outdoors


-
 Car & Moto


-
 Office Supplies and Stationery


 School SuppliesSchool Backpacks & Bags
Pencil Cases
Art Supplies
Stationery
Children's Writing Boards
Notebooks
Umbrellas & Raincoats
Notepads and Notebooks
School Folders
Desk Mats
Lunch Boxes
Briefcases
Technical Drawing Supplies
Stationery Holders
Learning Tools
Sketchbooks and Coloured Paper
Children's Scissors
Calculators


-
 Books
Books


-
 Food and Alcohol


-
 Health
 Dietary SupplementsSleep, Nerves, Stress
Fatigue, Exhaustion and Energy
Memory, Concentration
Digestion, Weight Loss
Circulatory System
Joints, Bones, Muscles
Urinary Track and Prostate
Health & Beauty
Reproductive & Sexual Health
For Women
For Men
For Children
For Seniors
Athletes
Antioxidants
CBD (Cannabidiol)
Sorted by Active Ingredient
Omega Fatty Acids
Joint Nutrition
For Animals
Christmas Packs


-
 Our brands


-
 Unsealed goods and bazaar
ROWAX Headlamp Renovation Kit
Headlamp Renovation Set to restore the dull and yellowed surface of the plastic headlamp, includes sandpaper, grinding wheels, polishing disc, velcro fastener, polishing paste, nano wax, microfibre cloth, cloth, instructions for use
Warranty 24 months
Code:
AUPR17009
Product Number:
20980
Producer's Website:

ROWAX Headlamp Renovation Kit
24.90 €
In stock > 5 pcs
Buy
ROWAX Headlamp Renovation Kit
Enhance the gloss of polycarbonate headlights with the special Rowax Renovation Kit. Damage to the headlamps occurs by UV radiation, washing in dishwashers, improper mixes of washers, salt and other effects of everyday operation. Blurred or damaged headlamps not only lead to opacity but also reduce the proper headlamp functionality. In many cases, they do not have to go to the STK.
Advantages of the Rowax Renovation Set on Headlights
- It revives the shine and restores the functionality of polycarbonate headlights
- Prevents problems with STK
- Use is effective to prevent yellowing and scratching
- Contains nano wax, polishing paste and more
- It is designed for gentle manual application
Highly effective preparations
With the Rowax, you'll get the right recharging and the perfect look and feel of the headlamps. It contains a water-based polishing paste and silicone-free solvents. The polymer-based nano wax is designed to create an invisible thin hydrophobic coating on the surface of the headlamps to accelerate water drainage and prevent contamination at a microscopic level.
The content of the Rowax kit
- Abrasive paper for wet grinding (size approx. 140 × 115 mm) 14 pcs - grain P400 (4 pcs), P800 (4 pcs.), P1200 (2 pcs.), P2000 (2 pcs.) And P3000
- Foam polishing disc (diameter 85 mm)
- Velcro fastener for attaching the polishing disc
- Single step polishing paste - 30 g
- Protective nano wax - 20 g
- Fine polishing cloth for applying and polishing protective nano wax - 2 pcs
- Instructions for use
Preparation and application of the Rowax Renovation Kit
Preparation
To renovate, we also prepare water and a rag to wash the headlamp, a water sprayer and a masking tape (if it is not a part of the kit). Before the renovation itself, the headlight is thoroughly washed. To protect the adjacent body parts, use a camouflage strip to protect the surrounding area from grinding.
Grinding
The Economic Kit contains only sanding paper for manual grinding. We transfer the abrasive paper, grinding alternately in the horizontal and vertical directions evenly across the entire surface of the headlamp. Depending on the degree of damage (cracked surface, deeper stones from stones,.) First grinding of the P400 grain will be done to dry and remove as many surface defects as possible. If the damage is not deep and the headlamp is not dull and yellowish, we start grinding with the P800. Grinding is done with wet sanding paper and the headlamp is kept wet with the sprayer, which also continuously rinses the ground material. Between each of the phases of the grinding, the headlamps are washed with water and we check the quality of the grinding so that we do not miss any part of the headlamp. The grinding quality depends on the overall renovation result, so grinding must be thorough for each grain used. Determine the surface of the headlamp for at least 5-10 minutes for each grain. The first grinding of the P400 grains is done for longer, until the cover coat is removed, the surface is unified (the grounded head must be evenly milky white, matte) and grinding of deep damage. Finally, the headlamps are washed with water and dried. We are careful not to impose any dirt on the headlamp, some of which may cause the surface to be damaged again by the grinding process. After grinding the final P3000 grain, the dipped-in headlamp will be almost transparent, after white, matt drying.
Polishing
Put the holster on the drill to attach the foam polishing wheel using a velcro fastener. Let the disc moisten with a few drops of water, apply a small amount of polishing paste on it, spread over the entire surface of the headlamp and start polishing. From the beginning, we maintain a lower engine speed and low thrust. With increasing polishing speed and pressure we increase. We gradually check the surface temperature of the headlamp. The temperature must not rise so that we can not hold the hand on the headlamp. Polishing is repeated twice, while using the same amount of paste on the second polishing. If polishing the headlamp paste, polish the headlamp with a small amount of water (e.g. using a spraying device or a few drops on the polishing wheel). Finally, we polish it dry. Once the polishing has finished, clean the headlight. We do not run in direct sunlight.
Protection
The final step is the application of the protective nano wax and its polish. Apply polishing cloths to apply and polish. Wax is applied all over the surface with circular movements. After drying (about 20 minutes), we wipe away and scrape off. To enhance the protective effect, the wax can be applied in two layers.
Recommended only for use on headlamps with reduced transparency and a yellowish surface (oxidation).The oxidation of the surface of the plastic headlamps occurs due to aging and the influence of external influences, mainly solar UV radiation. During renovation, the non-functional surface layer is removed. Incorrect appearance of the headlamps can also be caused by interior dirt (by evaporation of the reflective layer, dust), damage to the inner structure of the headlamp cover or to the chips from the stones. Damaged headlights are not intended for ROWAX renovation.
Specifications
Use
Application method
Use
Use
Use
Application method
Use
Use
Specifications can be changed without notice. Images are for illustrative purposes only.