How to scan photos and documents (GUIDE)
Scanner is a valuable helper both in the office and at home. However, you may not know exactly how to set it up and use it properly to your advantage. Its settings can bother even experienced users. We will advise you on how to avoid problems with scanning.

How to scan documents and photos? - CONTENT
- What type of scanner to choose?
- Scan resolution and speed
- How to connect the scanner to a PC?
- How to properly scan documents to PDF
- OCR scanning
- Scanning negatives and slides
What type of scanner to choose?
Scanners are devices used to scan an object, usually a paper with printed text or an image, and then convert it to digital form. When choosing a scanner, it is important to think about its exact purpose. For example, in most households, a scanner that is part of a typical multifunction printer is sufficient. Alternatively, a basic desktop scanner is an option too.
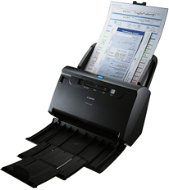
However, if you need to scan tens or hundreds of documents a day, you will probably look for a specialized scanner with a built-in automatic document feeder. If you are not entirely sure, look for a scanner according to our simple scanner buying guide.
Scan resolution and speed
The scanning itself is a process using a complex scanning mechanism composed of an optical system. Under the scanner glass, the document is scanned line by line. And the resolution of the scanner depends on the number of scanning points and lines. The higher the DPI value, the better and sharper the conversion quality. With increasing quality, the file size also increases, as well as time required to complete the scan. You usually find a scanner resolution of 600 × 600 DPI or 1,200 × 2,400 DPI today. The highest quality scanners offer a resolution of up to 4,800 × 9,600 DPI.

The possibility of selecting the output quality of the scanned document is also related to the scanning speed and the resulting quality. However, the individual parameters may differ slightly for different manufacturers.
| Type of the document | Type of the image | Resolution | Graphics type |
|---|---|---|---|
| Photo | Use for scanning photographs | 300 × 300 DPI | 24-bit colour |
| Web | Choose this option if you want to use the scanned document as an e-mail attachment or for a web page. | 100 × 100 DPI | 24-bit colour |
| Text | Use for scanning text documents. | 200 × 200 DPI | black-and-white |
Graphics type
The choice of the type of graphics also has a significant impact on the scan length, so if scanning a large number of documents, it is good to think in advance what quality will be most suitable.
- Black and white - used primarily for text or line art.
- Gray (error diffusion) - can be used for special type of graphics or photos. Error Diffusion is a method for creating simulated gray images without using true gray dots. Black dots are inserted into a special pattern so that they give the appearance of gray.
- Grayscale - suitable for graphics or images. This mode is more accurate because it uses up to 256 shades of gray.
- Color, 256 colors - Uses up to 256 colors to scan an image.
- Color, 24-bit - Uses up to 16.8 million colors to scan an image. The resulting file is up to 3x larger compared to scanning with 256 colors.
How to connect the scanner to a PC?
Connecting a scanner to a computer or laptop is not difficult. However, you need to consider what options your laptop offers. For example, the new Apple MacBook Air has exclusively USB-C type connectors, which cannot be used for scanners at this time.
- USB connection - direct connection of scanner and PC via USB cable.
- LAN interface - the scanner and computer are connected to a home or business network with a cable with RJ45 connectors.
- WiFi connection - the scanner connection is basically similar to a LAN, but the cable is replaced by WiFi transmission.
- Direct WiFi - direct connection of scanner and PC via WiFi.
- Bluetooth - connection to the scanner via Bluetooth wireless technology, suitable for example for scanning control via a mobile application.
- Connecting to a server or other PC - This is basically a type of network connection, except that the scanning process is controlled by another computer or server.
- Connection via LPT or serial interface - these days relatively exotic ports are almost non-existent on common scanners, with a few exceptions. However, they are still used in specific cases in the industrial or commercial sphere.
How to properly scan documents to PDF
There are a few basic rules to follow when scanning to PDF. The easiest way is to use the application provided by the manufacturer of the scanner or multifunction printer. Such an application is directly programmed for seamless communication with the scanner. Let's have a look at an example of a scanning device from HP. The HP Scan control app is automatically installed in Windows 10, along with the necessary drivers. Start the scanning process and select PDF as the output file. It's very simple.

Another option is to use the HP Smart application, which is very well designed and available directly in Windows 10, but is also available for Mac or Android and iOS mobile platforms.
How to scan to PDF in HP Smart
HP Smart has a very similar user interface on all platforms, which is easy to understand. The procedure for proper scanning is as follows:
- On the HP Smart Home screen, click the Scan button.
- In the Scan window, you can change the settings, such as document type (document or photo), page size, output type, source, resolution and compression according to the scan job, and then click the Scan button.
- A preview of the scanned document is displayed.
- You can make any changes on this screen using the editing tools in your application, such as cropping or rotating. You can also adjust the border manually by clicking and holding one of the blue dots.
- When you have finished editing, click the Apply button.
- Be sure to select the PDF output format.
- You can then print, rename, save, share, or add more pages to the scan.
OCR scanning
One of the interesting features of scanners is the OCR (Optical Character Recognition) method. If you work with text documents, you have certainly encountered OCR at work, for example. It is a software function which allows you to convert a scanned document into a text form, which you can continue to work with as a normal document in a text editor.
In practice, it is a valuable helper, because sooner or later this feature will come in handy. After all, who would want to manually rewrite a multi-page document, when it can be fully digitized in a few minutes, with a few clicks.
Many scanner manufacturers also provide OCR conversion as part of their software. Most of the time, however, it's just a technology demonstration or a time-limited demo. However, for a fantastic OCR accuracy, we recommend ABBY FineReader , which has the best long-term references in this area.
Scanning negatives and slides
Each home album contains dozens of older photos with great memories, which you definitely don't want to lose. Therefore, it is advisable to digitize them and save them to a computer, NAS server or some cloud storage. What will you need for that?

First of all, the best possible scanner adapted for scanning fields , cleaning aids and, of course, negatives or slides. Of course, working with them is the most complicated and requires a careful approach. If you only have black-and-white photos, don't worry. These can also be scanned relatively well.

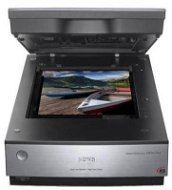
Special scanners designed for working with negatives and slides are equipped with special holders in which the individual fields are placed. However, the work does not end with scanning. Final retouches and corrections are necessary. We recommend using your favorite photo editing software. For example, it will be necessary to sharpen the images, use a retouching brush or a cloning stamp. Only then can the image be finally saved and shown to friends.
As we showed you in the article, the scanner has its irreplaceable place in every household. If you are planning to buy a printer, we recommend you to consider purchasing a multifunction model with a built-in scanner straight away. With a little effort, you will achieve great results.

 Free delivery
to Alza branch