

Reviews Fortron CST350 PLUS Black
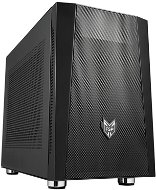
Reviews Fortron CST350 PLUS Black
Interested in reviews of Fortron CST350 PLUS Black? It got 4.7 out of 5 stars from our customers. Find specific customer reviews of Fortron CST350 PLUS Black below. We will appreciate if you also share your experiences with Fortron CST350 PLUS Black after purchasing.
User Reviews
Martin, Brno
Rated 03/05/2024, variant Fortron CST350 PLUS Black
Verified purchase - review from a price comparison website
SFX power supply is needed when using a wide mATX
small
fixed
0 ×Report
Jan, Orlické Záhoří
Rated 12/01/2023, variant Fortron CST350 PLUS Black
Verified purchase
Absolutely perfect case if you are looking for a smaller one but still want a mATX. It's probably the smallest mATX case that can be purchased, and the only one (other than the NAS case) that sized for the relatively vertically cramped space I have here. Even after more than a month, I'm absolutely thrilled with it. The whole case is metal and of excellent quality. All sides (sides, top, bottom, front) can be easily removed in a second, as no screws are used, and then put back on in a second. Despite its modest size, it is very customizable inside - it can fit both mATX and mITX in various configurations and can use both ATX and SFX power supplies. The fans can be mounted just about anywhere you want - the free space at the back is one big position to mount them at will. They can also be attached to literally any side you want. There's even an option to install the GPU vertically, but I don't know if that would make much sense for this particular case. But it's working! The whole interior is very cleverly conceived and gives the impression that the engineers have really gone to a lot of trouble (in a good way) in designing it. The maximum height of the CPU cooler of 155 mm fits exactly - I bought a 155 mm cooler and everything fits perfectly to the millimeter. Ironically, thanks to its modest size, this case has absolutely excellent airflow - of course, the temperatures also depend on your build, but even after several hours of RD2 ultra gaming, the CPU never had more than 55°C and the GPU never had more than 65°C, and at idle the CPU is easily 25-30°C, which is excellent.
What you need to think about is definitely a modular PSU, so that you don't have unnecessary unused cables in a smaller space. This is true in general, of course, but doubly so here. As for the PSU, it is installed a bit unconventionally next to the front panel (front down) and not on the back side as usual. A broken power connector leads to it from the back. Make sure that the middle fork in the connector in your PSU is pointing "away" from the fan, otherwise you will still be able to install and connect the PSU, but you will have to "break" the cable quite a bit. "
It is definitely advisable to think several steps ahead when installing. Install the GPU last; with the combination of installed 155 mm cooler and GPU your fingers will not reach any connectors, so prepare MB, install it, then connect all power connectors to it and only then install the GPU last.
Once assembled, the interior gives quite a bit of a "filled in" impression, but as a whole it works great. Some may miss the fact that it doesn't have a transparent sidewall. The whole case, however, looks unobtrusive, but at the same time elegant and professional. And seeing the computing power that fits in this tiny cabinet in action will bring a smile to your lips!
Very sophisticated interior with various configuration options
Screwless attachment - the sides of the case just need to "break out".
ATX and SFX PSUs
Vertical GPU option
Perfect aiflow
All-metal
Elegant appearance
Be careful that the middle fork in the connector of your PSU is not on the same side as the PSU fan, otherwise you will have to "break" the cable a lot.
Installation more thought intensive - all steps need to be thought out in advance and the manual needs to be studied
0� ×Report
Anonymous customer
Rated 09/08/2022, variant Fortron CST350 PLUS Black
Verified purchase
cleverly designed space
nice and quality material
fits both atx and sfx PSUs
good airflow
the screws came in a nice package: -)
confusing instructions (this is the 7th PC I' m building and I had quite a problem)
0 ×Report