How to Connect a Printer, Install Drivers, and Set Up Basic Functions?
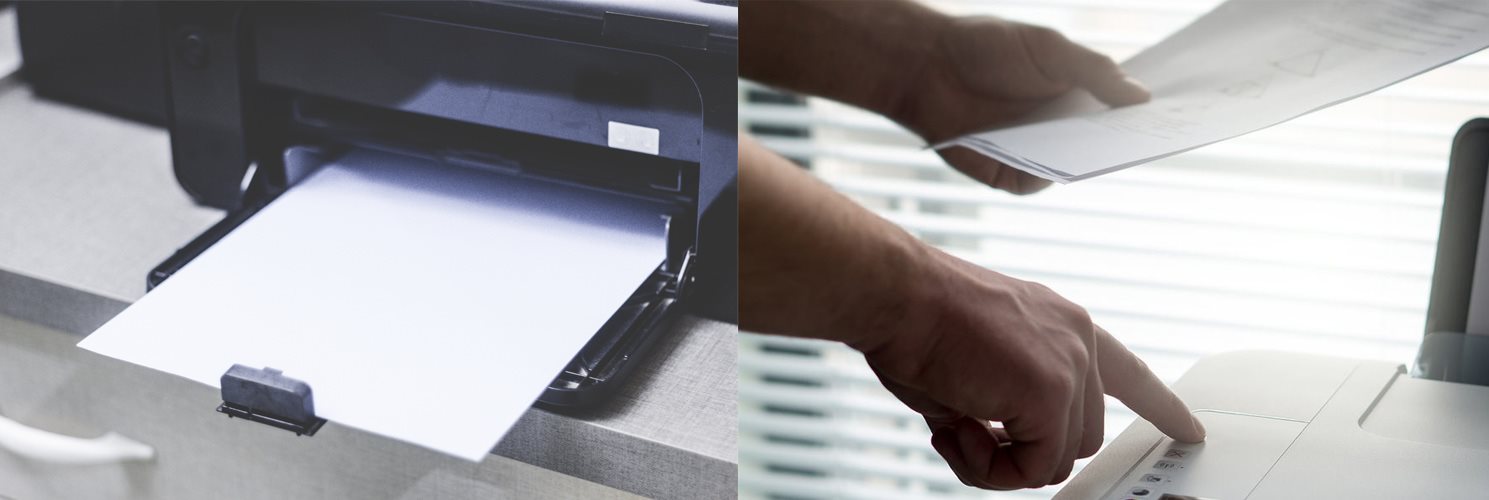
No matter if it's a newly purchased or an older printer, it is always necessary to connect it, install it and sometimes even set it up. So how to put the printer into operation? We will briefly describe the connection of the printer to a computer and to the network (with a cable or wirelessly), what are the drivers, how to get them and how to install them.
How to Connect the Printer (INSTRUCTIONS) - CONTENTS
- How to connect the printer: via WiFi or with a cable?
- What are the drivers and how do I install the printer?
- Printer settings: how to turn off monitoring of toner levels and how to increase image resolution?
- Printer maintenance: cleaning of the printhead and removing excess toner
How to Connect the Printer: via WiFi or with a Cable?
When it comes to connecting the printer to a computer, there are several options. The printer can be connected with a cable or wirelessly. For a wired connection, we commonly use a USB or Ethernet cable, and a WiFi or Bluetooth for a wireless connection. It depends on how and where exactly we want to connect the printer: whether to a single device or to a local network. Connecting the printer to a computer is very simple: just link up both devices with a USB cable. However, if you want the printer to be visible to all computers and mobile phones in the network, the connection will be a bit more difficult.
It's always about the particular type of printer. There are more ways to connect the printer:
- WiFi (network connection): The WiFi module is a common equipment in modern printers. With its help, the printer can be connected via WiFi as easily as a computer or mobile phone.
- WiFi Direct (connection to one device): this is also called peer-to-peer wireless connection. The printer creates a small WiFi network which surrounding devices can connect to. This is a wireless alternative to a USB cable rather than a network connection.
- Bluetooth (connection to one device): a very similar type of connection as WiFi Direct, but using the Bluetooth interface, which is practical because there is no need to switch the WiFi network on the device (disconnect from the Internet).
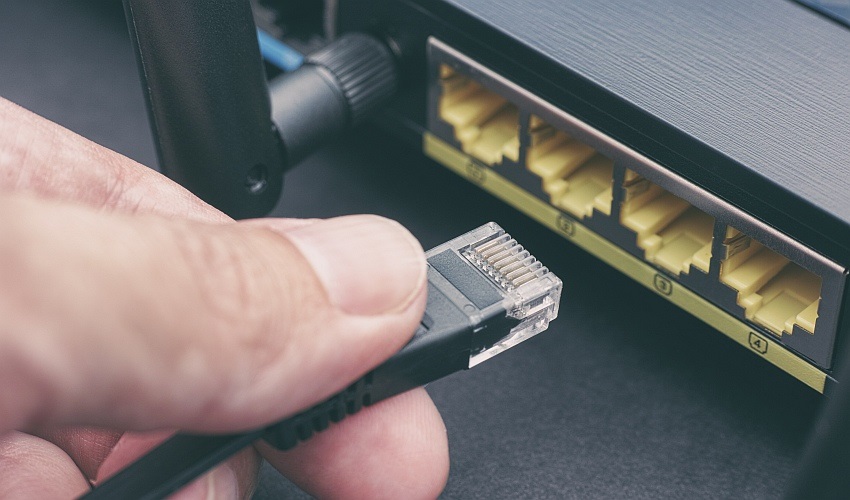
- Ethernet cable (network connection): a traditional way to make a network printer. All you have to do is connect the nearest WiFi router or switch to the printer using a network cable.
- USB (single device connection): A very basic way to connect a printer to a single device. Almost all new and old printers are equipped with a USB connector.
- USB (network connection): You can also use a USB cable to create a network printer, but you must have a WiFi router with a USB connector and a built-in print server. If you have it, you usually just need to connect the printer to it and the router will take care of its visibility on the network. If your printer does not have a print server, you can purchase an external module.
- Connection via LPT or serial interface: today, relatively rare ports are almost non-existent on common office printers, with a few exceptions. However, they are still used in specific cases in the industrial or commercial sphere (automatic lines, cash register systems, etc.).
Connecting the Printer via USB (INSTRUCTIONS)
The most common way to connect a printer to a PC is the USB cable. According to the type of connector, A or B, the cable connects the printer directly to the PC.
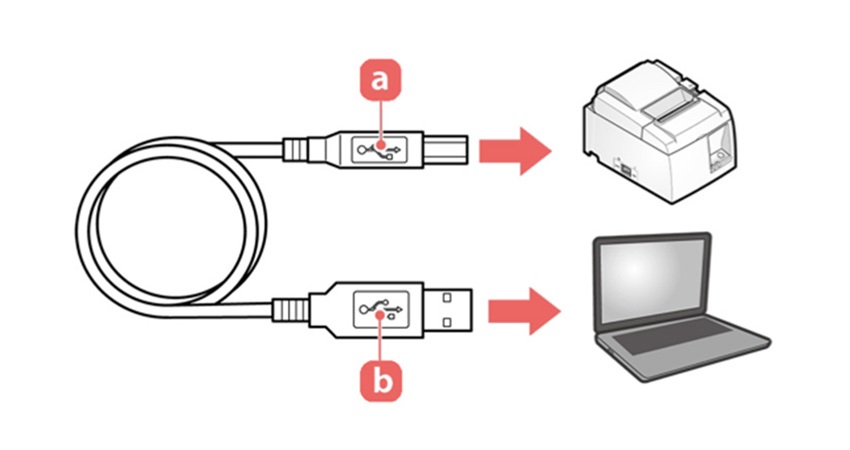
Although USB is a universal connector, connecting a printer may not always be trouble-free. It is because of the different implementation of communication with the printer on the part of manufacturers, especially with regard to various combinations of printers with scanners , card readers or consumables management, etc. Fortunately, the procedure is usually similar, with a simple principle: the printer is connected only after the software is installed, which is also pointed out, for example, by covering the USB port on the printer. It is definitely worth reading the manufacturer's instructions carefully.
How to Connect a Printer via USB - General Procedure
- Insert the CD or download the installation files from the manufacturer's website.
- Start the installation.
- Connect the printer when invited by the installation program.
- Complete the installation.
Connection via LAN and WiFi (INSTRUCTIONS)
The connection of the printer, whether via WiFi or LAN , is almost identical in its procedure. The only difference is the need to enter parameters for WiFi connection. For the printer, there is no uniform procedure for setting the IPv4 address (it consists of four numbers from 0 to 255, e.g. 192.168.0.24) or WiFi parameters and varies greatly from manufacturer to manufacturer. It is therefore necessary to study the corresponding instructions carefully. In any case, you should get the IPv4 address at the end, which is not assigned by the DHCP server, but the one that is called a static IP address.
Although the procedure below may seem quite long, it actually only takes a few minutes. We consider it a universal way to a trouble-free printer. Installation applications for specific devices often make similar settings automatically, but in certain situations may not lead to the desired result.
INSTRUCTIONS - Connection via Data Network (LAN, WiFi)
- Insert the CD or download the installation files from the manufacturer's website, you will need a file with an .inf extension.
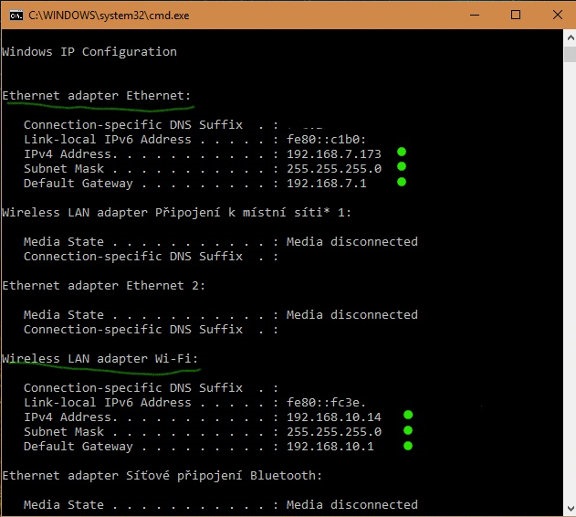
- Find the IPv4 addresses of the computer - press the Start button, type cmd and press Enter to start the command prompt, then type ipconfig again without further clicking and press Enter again.
- The corresponding addresses are indicated in the attached figure below. With a normal PC connection, usually only one of the network adapters is active, but just for illustration we also show the situation with multiple connections. Here you need to choose the one that corresponds to the same network to which the printer is connected.
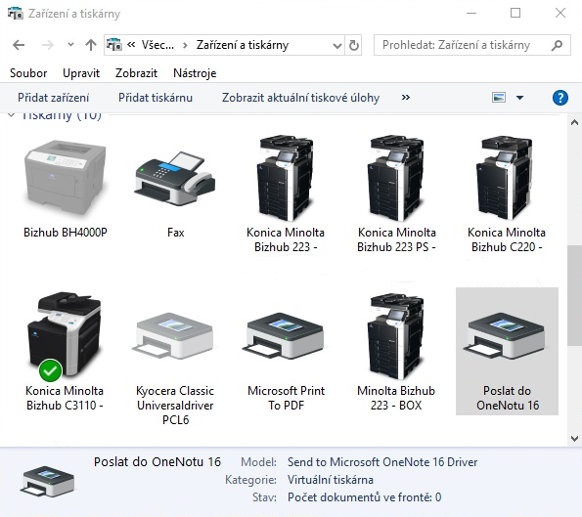
- Follow the steps above to open Devices and Printers.
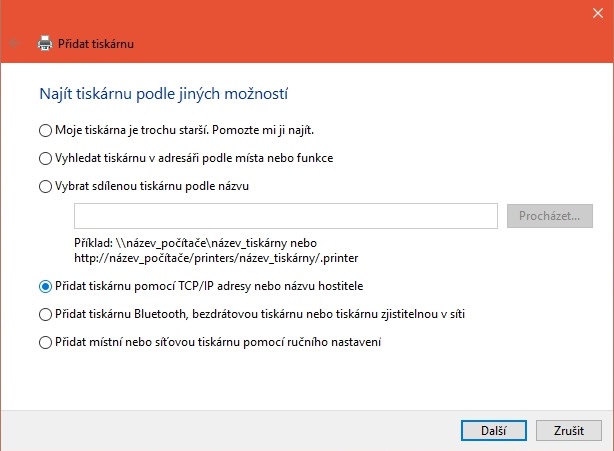
- Select Add a printer from the top bar. At this point, a window opens with the option to select a network printer. You must select The printer that I want isn't listed.
- In the next window, select Add a printer using a TCP/IP address or host name and click on Next.
- Fill in the Hostname or IP address: as assigned or set on the device. The port name is filled in automatically and it is not necessary to change it. The box Query the printer and automatically select the driver to use, should be left unchecked.
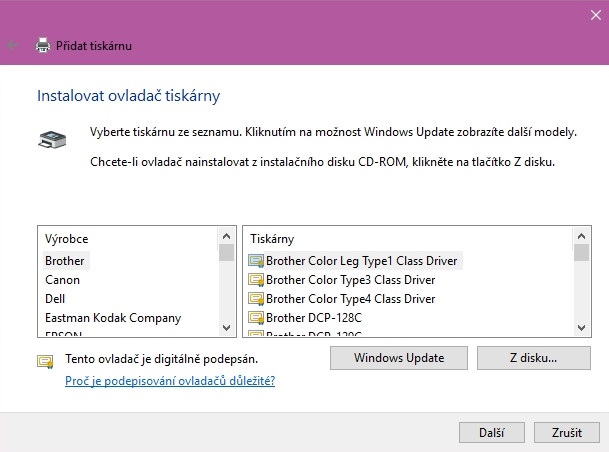
- In the next window, click on "From disc" button.
- A window for selecting the driver path will open, there you can use the Browse button to select the path to the drivers downloaded in point 1 of this procedure. Press OK and let the drivers install.
Note: If the drivers have previously been installed on the PC in any way, it is also possible to search for them in the displayed lists according to the manufacturer and model of the printer and use them immediately. - In the next step, you can only edit the printer name so that it is understandable to users, and click Next to complete the installation.
- After the installation is complete, you will be invited to print a test page, or you can ignore it and just press the Finish button. This completes the installation.
More about Connecting via Bluetooth and WiFi Direct
In certain situations, the printer installation is not necessary, and may not even be appropriate for security reasons. For example when printing from other people's computers or mobile devices that shouldn't have access to the entire network. For such cases, printers are often equipped with Bluetooth or WiFi Direct technology.
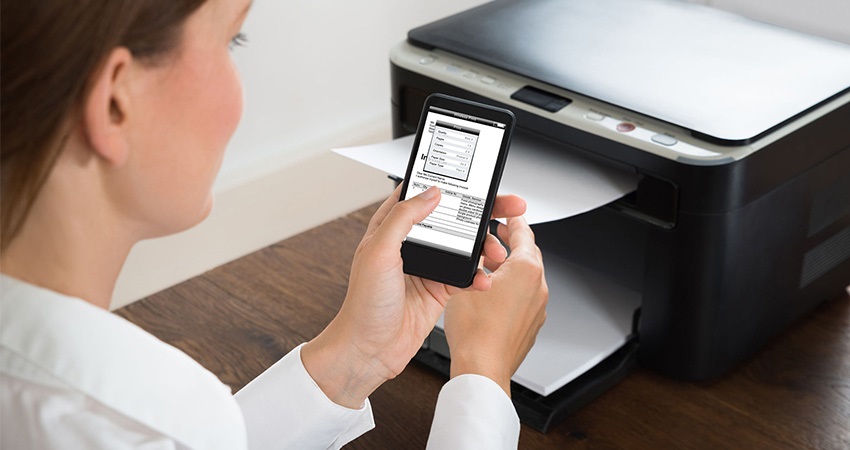
Unfortunately, the interconnection procedure is always closely related to the specific model of the printer and the connected device, so it is not possible to define a universal procedure. The manufacturer's instructions are good helpers here for successful printing. In some cases, the installation of a Bluetooth printer is similar to the previous procedure, except that the appropriate option is selected in step 6.
HP Sprocket, a pocket printer not only for traveling (REVIEW)
Although Bluetooth transfer speeds are relatively low and it can take a relatively long time to print, especially full-page photos, the undeniable advantage of this technology is that it can be found almost in all mobile phones , tablets , notebooks , etc. Bluetooth is thus more suitable for connecting portable printers, to print cash receipts or small-format photos.
Network Shared Printer (INSTRUCTIONS)
Installing a printer that is shared from another computer or server is typically used in a corporate environment, but it is not a problem to use a similar procedure at home. An important condition is a running computer through which the printer is shared. The advantage is significantly simpler installation on connected devices and uniform print management.
Instructions:
-
In a home environment, the first step is to share the printer. In the Devices and Printers interface, right-click the selected installed printer to open the context menu and select Printer Properties. On the Sharing tab, it is best to check all the boxes and select OK. If someone on the network still has an older 32-bit computer, you can add drivers using the More Drivers button. The procedure is then similar to the one from point 8 above.
-
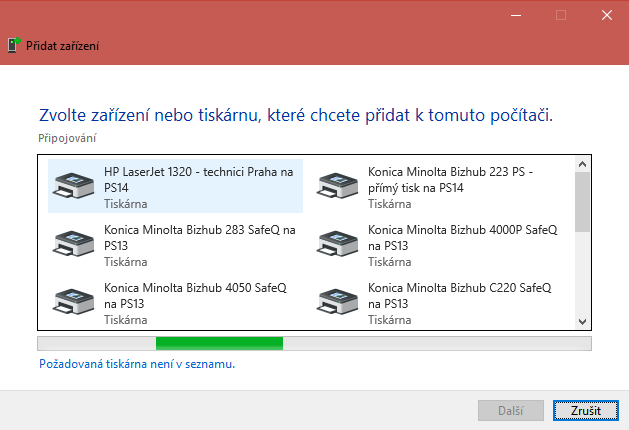
The easiest way to connect to a network printer is to simply open the Device and printers as described the introduction to the article, and then follow the chapter Connecting via a data network (LAN, WiFi) to the point 4, with the difference that the printer you want is selected from the list.
- After a few clicks on the "Next" button, the printer will be installed and a final invitation to finish the operation will appear, with an option to print a test page.
- Another option is to find a shared printer in Windows Explorer while browsing the network, and double-click to connect and install it.
- However, both of these methods require proper configuration on the server. Printers are not always visible, especially in companies, and require special procedures. However, they are usually taken care of by the authorized staff, and therefore we don't need to talk about them in more detail.
Connection via Parallel or Serial Interface (INSTRUCTIONS)
Just for the record, we will also mention the possibilities of connecting printers via LPT (parallel) or RS232 (serial) ports which are now rarely used. Today's computers do not normally have these ports, so the connection would require special adaptors. In addition, the transfer speed of these ports is very low, so printing a page with photos, for example, would take significantly longer.
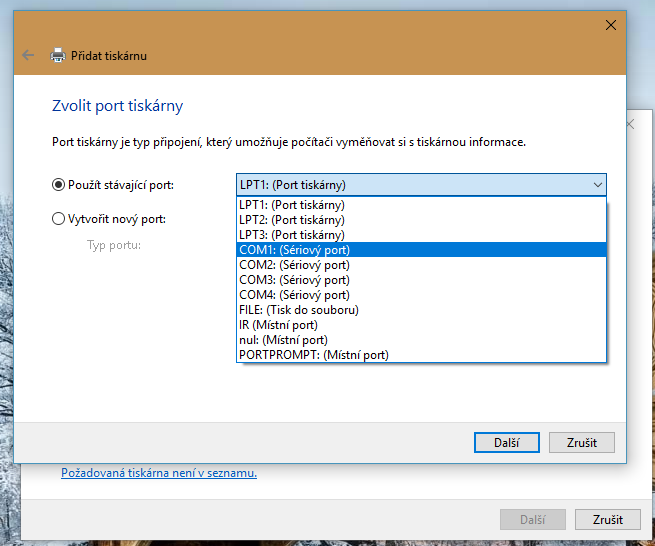
The installation itself is similar to the installation of printers on a data network, only in step 5 select "Add local or network printer using manual settings" and in the next window select the appropriate port. The next steps are already similar to those mentioned above.
What are the Drivers and How Do I Install the Printer?
Gone are the days when it was necessary to install the drivers from the attached CD for the basic operation of the printer. The option is still there, but thanks to the most used operating system (Windows 10), installing the printer can be much easier and completely automatic. Once you've inserted the toner / ink and paper in the printer, all you need to do is connect it to your computer. The operating system recognizes most new printer models and allows them to be used immediately.
In a computer context, a driver is a software program used to make a device work properly with the rest of the system. The driver itself is usually an invisible set of tools that only the system works with so that the user does not have to deal with anything. However, manufacturers of computer peripherals (including printers) often provide add-on programs to their drivers that allow the user to set up the device or use its advanced features.
But there are also older printers and older operating systems that don't follow automatic installation standards. Therefore, sometimes you still need to install the drivers manually. We can do this either by using the attached CD or by downloading the drivers from the manufacturer's website. If you have an optical drive , you can insert the installation CD, then click on its icon in the My Computer section and install the manufacturer's software according to the instructions. If you do not have an optical drive or CD, you can find the drivers on the manufacturer's website.
Devices and Printers: Where and How to Set Up Printers? (INSTRUCTIONS)
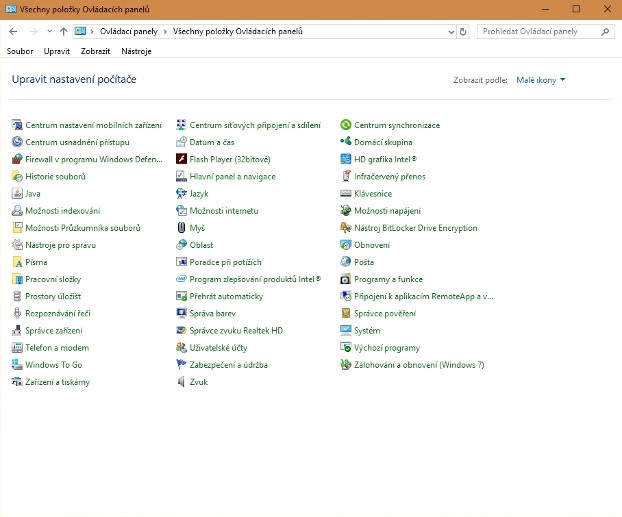
Whenever you need to work with the printer settings on a computer with Windows 10 , there are basically two different options where you can do so. Although Microsoft is gradually making the interface look more modern with every new update, it is still better to use classic control panels for most actions. For printer configuration purposes, there is a Device and Printers item in the control panel. Where can I find the starting point for setting up printers?
Instructions:
- Press the Start button (Windows symbol on the keyboard or on the display).
- Start typing Control Panel and launch it as soon as the application appears in the options above the text line.
- In the window that appears at the top right of the "View" option, select Small Icons.
- Choose Devices and Printers from the list.
Where to Download Drivers for Your Printer? (HP, Epson, Canon, Brother, Lexmark)
After clicking on the manufacturer's website, enter the model number of your printer so that the website shows you compatible drivers. Download them using the Download button. After downloading, open and install according to the instructions of the installation program.
Installing a WiFi Printer on a Network
WiFi connectivity is a standard for most modern printers, so almost all users can have a network printer at home easily and quickly without the need for professional setup. All you have to do is connect the printer to a wireless local area network and then just set it up on your computer. Let's take a look at how to do it.
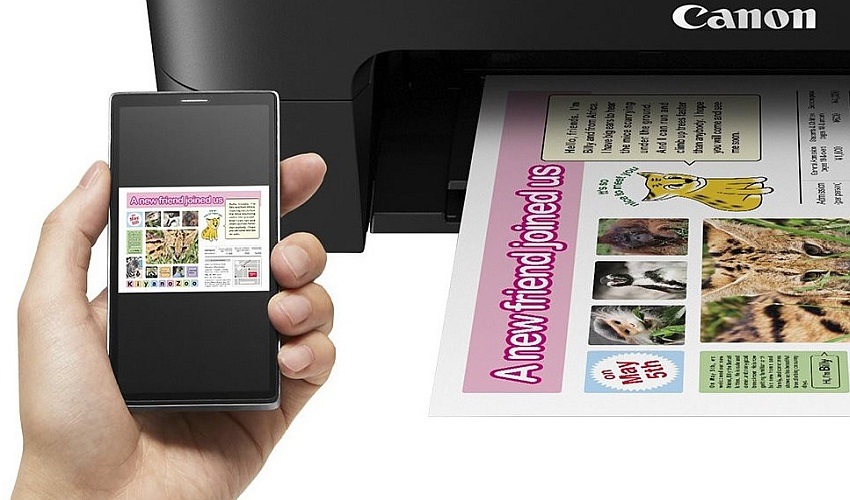
There are three basic ways to connect the printer to a local area network:
- On the printer display: Many printers have a display that allows you to go through the printer settings, including connection methods. If your printer has a display, you can directly find the WiFi connection option in its settings, select a wireless network, and connect the printer to it. You will either be able to enter the password directly on the display or connect the printer to the network using the WPS button on the WiFi router.
- On the computer: If your printer does not have a display, you can connect it to your computer with a USB cable, download and install the manufacturer's software (see the links provided earlier in this article), and then set up a wireless connection for the printer. Just select the network and enter the password.
- In the mobile app: Many manufacturers also supply their printers with mobile apps available on Google Play and the App Store . After downloading it, all you need to do is connect the printer to a mobile phone via WiFi Direct. To do this, press and hold the appropriate button (the one with the wireless network icon) on the printer, and then connect to a WiFi network on your mobile phone, the name of the network will suggest that it was created by the printer. Once connected, you should find the option to register the printer in the application, and then connect it to your home wireless network using your name and password.
Printer Settings: How to Turn Off Monitoring of the Toner Level and Increase Image Resolution?
There is usually no need to set up printers, just connect them. Yet there are still some settings, which are good to be familiar with, otherwise they can sometimes make printing complicated. For example, when you insert a new ink cartridge in the printer, printer sometimes doesn't recognize it, and therefore refuses to print due to insufficient cartridge. This problem can occur with older inkjet printers, so it's always good to know how to solve it. And the solution is not complicated: just hold the Stop / Reset button for a few seconds to turn off the ink level monitoring and you can continue with printing immediately.
But then you can run into other, much more common problems, such as how to increase the resolution of the image so that it looks good after printing. It is important to monitor the dpi (dots per inch) value, which indicates the resolution of printing. Higher dpi means higher dot density, and therefore higher print quality. But as you may know, the size of digital photos is measured in megapixels. So how many Mpx should the image have to achieve a sufficient size and quality after it is printed?
It depends on the dimensions of the printed photo. The ideal value for quality printing is 300 dpi (or even 600 dpi), but we need a simple formula to correctly determine the image size in Mpx.
Example: The 12Mpx camera of the newest iPhones takes photos with a resolution of 4,288 × 2,848 px. When we insert these dimensions in the formula, it turns out that with high-quality printing (300 dpi) we can obtain photos with dimensions of 36.3 × 24.1 cm. If you are satisfied with lower print quality, you can have even larger photos. If you use photo editing software, you can set the automatic conversion between Mpx and dpi. Then you will see how big your photo can be already during editing.
Most printers work with 300 to 600 dpi, but if for some reason you decide to print at a lower quality (typically 72 dpi), you can change the default dpi. Follow these steps: Control Panel → Hardware and Sound → Devices and Printers → Right-click the connected printer → Printing Preferences. Unfortunately, we will no longer advise you on navigation, as the menu is different for each printer. But look for actions such as resolution and quality or dpi, and then set the highest value available in the menu.
Printer Maintenance: Cleaning the Printhead and Removing Excess Toner
The printer must be regularly maintained and it is not necessary to visit a service center for basic cleaning. You can do a lot at home, including cleaning the print head. All you need is a dry, lint-free cloth and a soft brush. There is a difference whether you are cleaning a laser or inkjet printer, so always refer to your printer's user guide for cleaning instructions and follow them. Also, be sure to unplug the printer and allow it to cool down before cleaning.
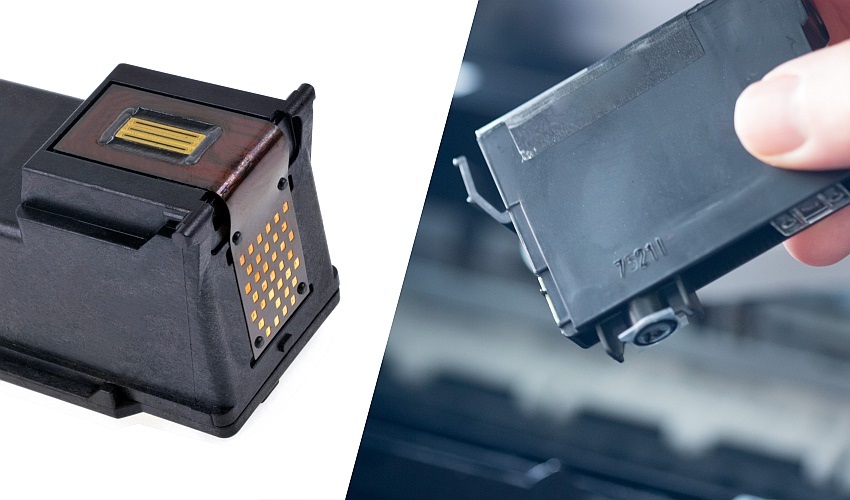
The most important thing when cleaning an inkjet printer is to clean the printhead. You can do this by partially immersing it in isopropyl alcohol. It only takes a few minutes and a few millimeters to immerse the contacts at the bottom. Then dry these contacts with a paper towel. There is no print head in the laser printer: the most important thing is to remove the toner cartridge and blow out or vacuum the accumulated toner powder inside the printer, preferably with compressed air. Then you can wipe the cleaned areas with a cloth soaked in isopropyl alcohol for computers and accessories. Important: never remove the door or plastic parts secured with screws, as this may void the warranty.
Connecting a printer and installing it is usually an easy process that anyone can do with a little help. However, if you don't feel like cleaning the inside of the printer, feel free to visit a service center.
