Try our cookiesAlza.cz a. s., Company identification number 27082440, use cookies and other data to ensure the proper functioning of the website and, with your consent, also, among other things, to personalize advertising and the content of our websites. By clicking on the “I understand“ button, you agree to the use of cookies and the transfer of data regarding the behavior on the website for displaying targeted advertising on social networks and advertising networks on other websites.
We use 8 categories of cookies on our website:
Technical cookies
These are strictly necessary for the functioning of the website and the features you choose to use. Without them, our website would not work; you wouldn't be able to log in to your user account, for example.
Functionality cookies
These cookies allow us to remember your basic choices and improve the user experience. These include remembering your preferred language or allowing you to stay logged in permanently.
Social media cookies
These cookies allow us to easily link you to your social media profile and, for example, allow you to share products and services with your friends and family.
Content personalisation
These cookies allow us to show you content and ads according to the information we have about you to best meet your needs. This includes what content you have viewed, or on what device you are accessing our website.
Non-personalised advertising
These cookies allow us to show you general ads for products and services.
Personalised advertising
Thanks to these cookies, we and our partners can offer you relevant products and services based on your purchases, your shopping behaviour and your preferences.
Audience metrics
These cookies allow us to optimise our site for your convenience based on how you use it. The aim is to remember or anticipate your choices. This includes, for example, the use of features, their location, or the behaviour on the page.
By giving your consent to the processing of cookies, functionality and analytical cookies will be installed on the device you use to browse the website (click on the "I understand" button for both categories, or you can select only one of the categories by clicking on the "Settings" button). We always install technical cookies on your device, even without your explicit consent, because without them our website would simply not work.
You can revoke your consent to the processing of cookies. In connection with our company's cookie processing, you also have the following rights: the right to access cookies, delete, modify, supplement and correct them, restrict processing and the right to lodge a complaint with the Office for Personal Data Protection. Read more about your rights.
Cryptocurrency mining has been around since 2009. Back then, it was basically just an experiment done usually only by a few nerds on community forums. A lot has changed in the past few years, however, and nowadays, Cryptocurrencies can be mined by virtually everyone, especially thanks to modern software that provides a wide range of controlling tools, easy setup through a graphical interface as well as comprehensible monitoring. In the following article, we will introduce you to the HiveOS mining software to demonstrate how you can manage your mining machines.
How to Mine Cryptocurrencies with HiveOS (HOW TO) - CONTENTS
Introducing HiveOS - the Tool for Managing Your Mining Machines
Experienced members of the GPU/CPU mining industry (i.e. those who have been in the mining industry using standard computer hardware) are certainly no strangers to mining software such as the traditional ETHos or SimpleMining. Both of these software utilities are well known for their simplicity.
But what if you are one of those who manage a really large number of mining machines or just like to play with Linux? HiveOS should be your software of choice, or at least you should try it out.
HiveOS had only recently been created at the time that I was testing it, so I can't deny that I had my doubts when I was deploying it in live operation. From the beginning, however, I was enchanted by the software's clarity and features that I hadn't encountered in any other interface, so I decided to test it out right once I had recovered from the initial hurt.
Since then, it's been a few months and the UI has undergone some very practical changes, especially in the update to Hive v2 that took place in the autumn of 2018. So let's take a look at what the software currently has to offer and see its strengths and weaknesses.
How to Install HiveOS?
As is usual with mining software, the installation consists of writing the software image to any bootable, writable disk. In this case, prepare a storage device with a minimum capacity of 8 GB.
iI recommend using a USB flash drive, but I would stay away from low-end models since they use very cheap memory chips that soon get destroyed by frequent overwriting. If you reach for any USB 3.0 flash drive worth at least 400 CZK, you won't make a mistake and it will serve you for several years.
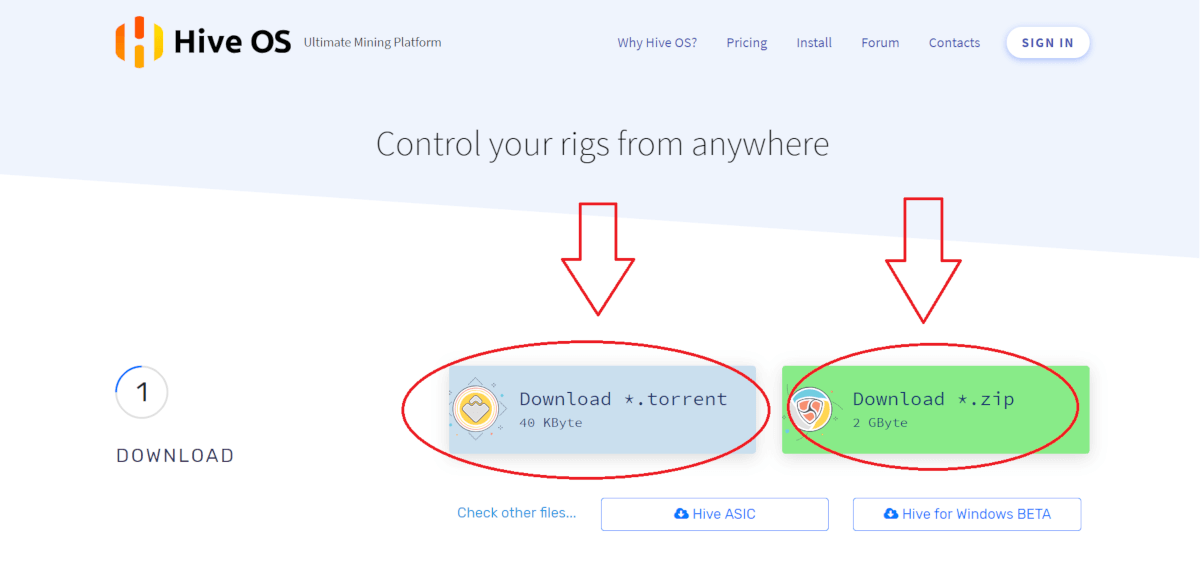
So before installing HiveOS itself, let's start by preparing the disk. For security reasons, I do not recommend downloading images other than those from the official site, which can be found at hiveos.farm.
The site will let you choose from downloading via torrent or direct download from the HiveOS server. Once selected, simply download it and unzip the file. The file needs to be unzipped before the installation.
Once unzipped, the file with your Hive is ready, hidden under the name [version name].img.
For Windows users, I recommend downloading a utility named Etcher (available e.g. here). The program is very simple: select the file, select the flash drive and click on Flash! It couldn't be easier.
iIf you need to create a large number of bootable flash drives for a large number of rigs, just run Etcher a few times. You can flash to a different flash drive in each instance of the program, thus speeding up the software preparation considerably.
Using the Command-Line and the DD Utility (macOS and Linux)
Just enter the command in the form: dd if="file location" of="flash drive name". Thus, for example. "dd if=/home/downloads/hive. img of=/dev/sdb". If you want to see the current copy progress, just add the "status=progress" parameter. Of course, if you don't like using the command line, you can also use any graphical disk utility that your system has that allows you to extract the image to a flash drive. I can recommend, for example, disk utility in Ubuntu, it has been very useful for me.
The installation disk for HiveOS is now ready.
Linking the Mining Machine to the Web Interface
Boot the rig from the flash drive and wait a few minutes. HiveOS automatically downloads and installs all updates on the first boot. This may take a few minutes, depending on the speed of your internet connection. To set up the software, you will need a monitor and keyboard, so keep them connected to the rig when you start it.
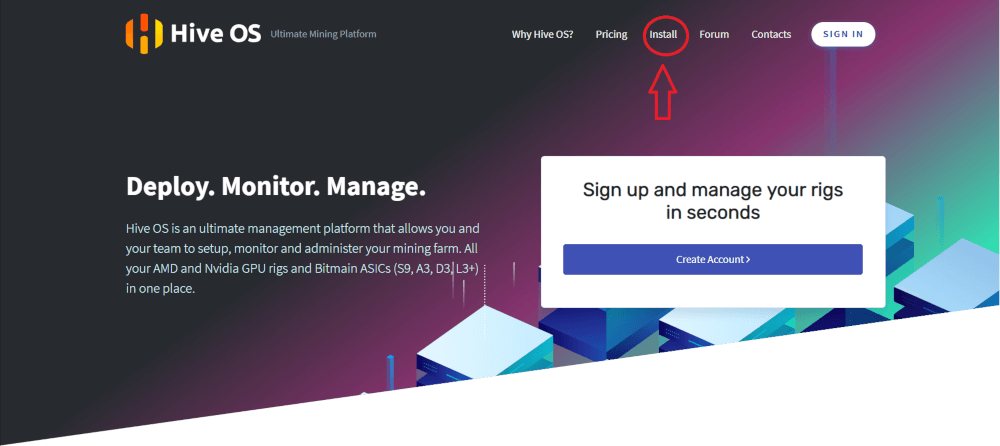
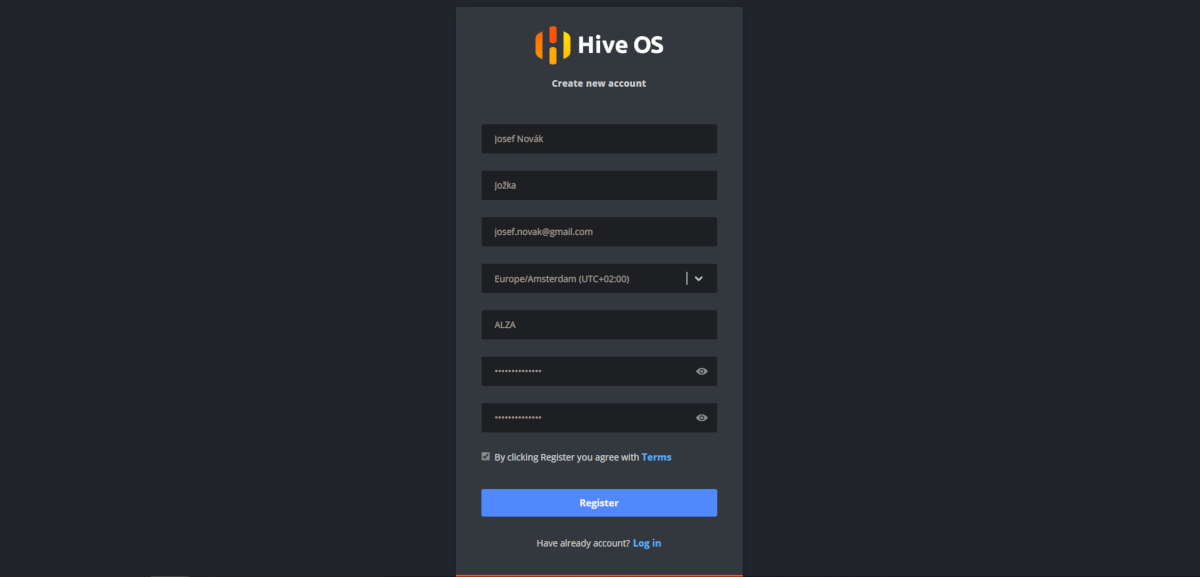
You can shorten the wait for updates by creating the user account (you will need to have one). Go to the page https://hiveos.farm?ref=60251 and create your user account by clicking "Sign in" in the top right corner and then "Register" at the bottom of the page. When you register, just enter the magic word ALZA in the "Promocode" box to get 10 USD credits for free. More on the price of the software later in the article but I'll let you in on a secret now - it's free to use.
After downloading all the updates, you will be greeted by a command prompt, as HiveOS runs on the Linux Ubuntu kernel. If the command line makes you feel uncomfortable and nauseous with all those characters and letters, don't worry. If you don't want to, you won't have to look at it soon.
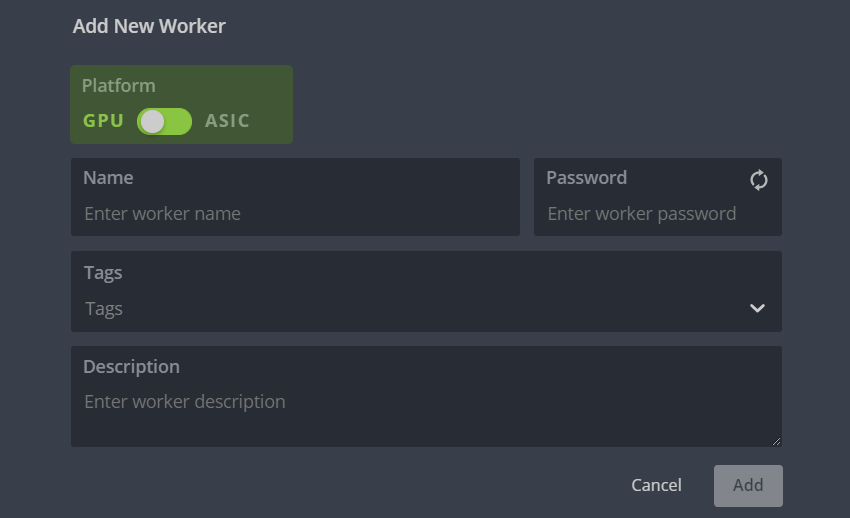
Click the "+" button opens the preferences menu. Select "Add Worker" and continue by filling in the following window:
Name – The name of your rig - e.g. Rig 1.
Password – You will use this password to synchronise the rig with your account, I recommend having it randomly generated using the two arrow symbols in the upper right corner.
Tags – An advanced management tool that allows you to assign a tag to your rigs, based on which you can then apply certain settings only to rigs with the selected tags or e.g. rigs can be shared with other users of the software.
Description – You can write any of your notes here. Personally, I tend to post here the exact model of the mounted cards and the designation of the physical location where the rig is located. This is very useful if you manage a large number of rigs.
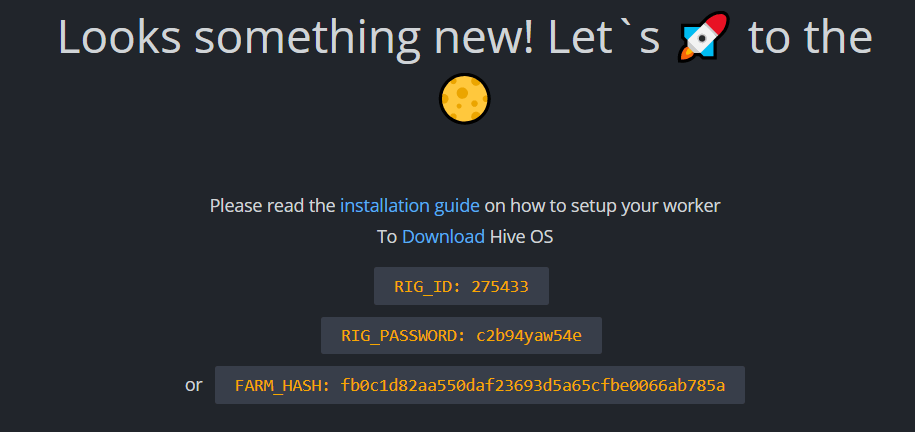
Pressing the "Add" button opens the following screen. You want to click the following two options: "RIG_ID" and "RIG_PASSWORD". Now it's time to move back to the ring.
Press Enter on the keyboard that you connected to the rig, then type "RIG_ID", confirm with Enter, type "RIG_PASSWORD" and confirm again.
Now the software will ask us if we want to change the Linux user's password. I'll leave that step up to you. If you are running 3 rigs on your home network, it is relatively safe to keep the default password "1". If you are managing multiple rigs, I definitely recommend changing your password. However, the worst thing that can happen to you is that someone changes your payroll address on the pools, which you will notice within a few hours.
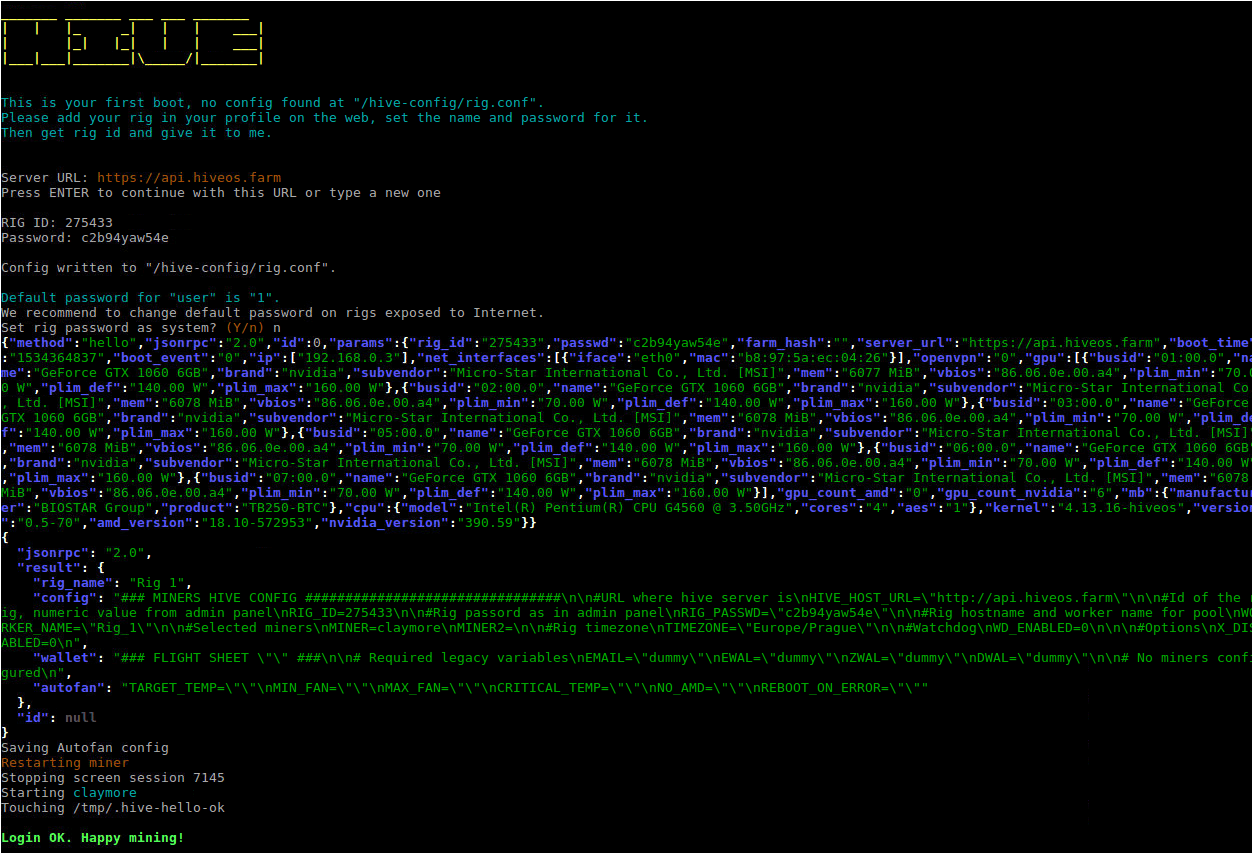
Once the rig greets you with the phrase "Login OK. Happy mining!" the battle is won.
iIf you are running a large number of rigs, there is a much faster method to add a rig to the software using the Farm hash. The Farm hash is a universal identifier for your account, which can be found on the website by clicking the Settings tab in your rig overview. Just connect the boot flash drive to the computer with any operating system. The flash is divided into two parts. One with the operating system and one with the configuration files.Open a flash partition of several MB, in which you will find the file named "rig-config-example. txt." Open this file in a text editor and insert your Farm hash after "FARM_HASH=" and save this file as "rig.conf." Ensure that you have indeed changed the file extension from "txt" to "conf." Now you can skip the whole procedure of clicking the "+" button. Just run the rig with the modified flash, and it will add itself to the web interface without the need to copy any code.
Starting Mining and Its Configuration in the HiveOS Environment
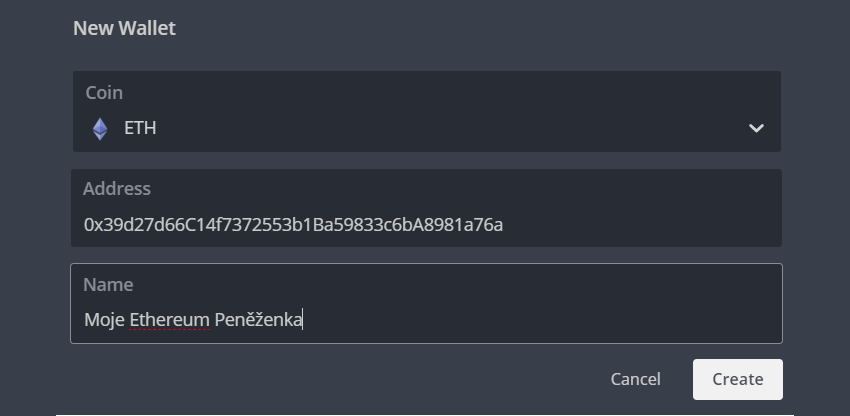
Let's open the wallets tab. We'll add your wallet addresses here. Click on Add Wallet, select the currency, enter the address, name the wallet and save.
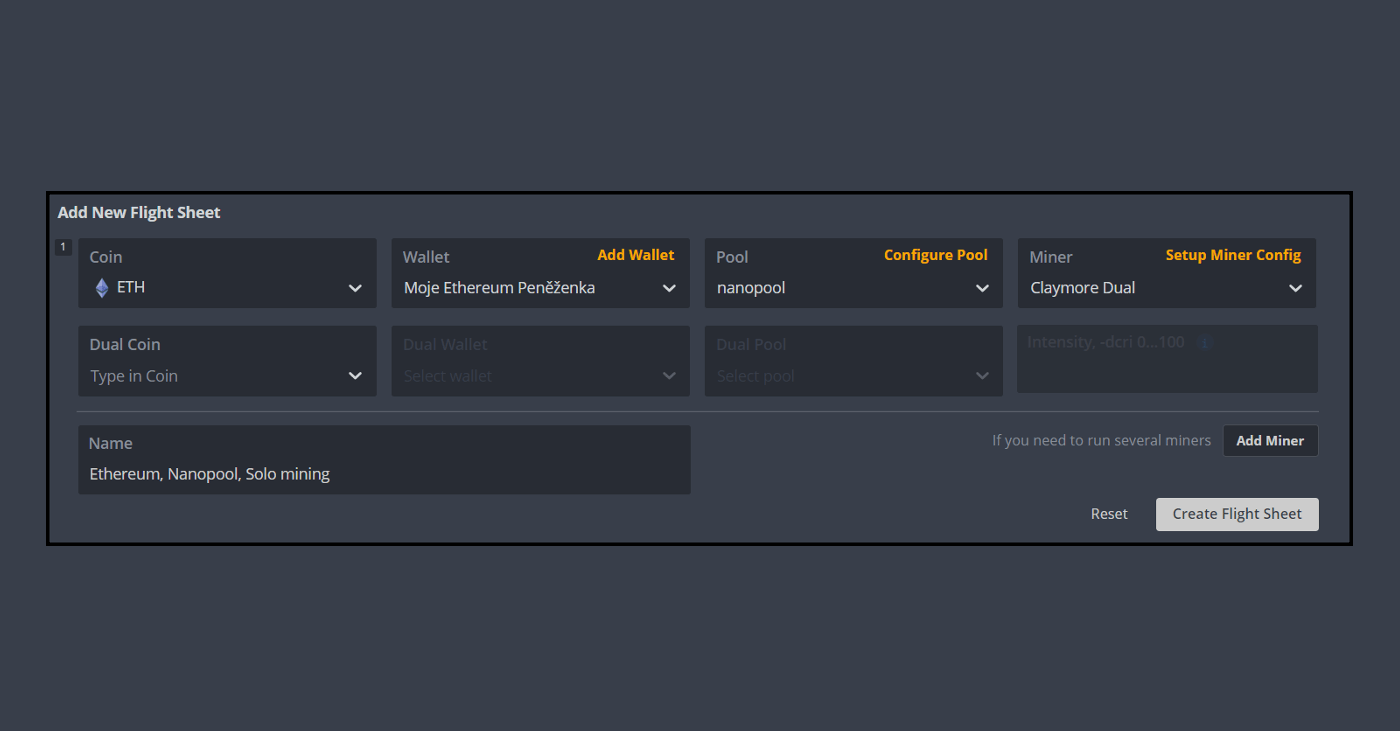
The wallet has been entered. Done. Now it's time to set the miner. Click on the "Flight Sheets" tab, fill in all required fields according to the template and click on "Create Flight Sheet".
iIf you want to customise the settings of your miner (e.g. add custom parameters or mine on a pool that is not in the menu), click on the orange "Setup Miner Config" sign, and you can set up a completely individual profile here.
Now let's go to the rig overview ("workers" tab) on the default page. Click on the name of the ring to access the ring control panel. From here, you can control everything from mined currency to GPU clock.
Click on the "Flight Sheet" tab and click on the rocket symbol.
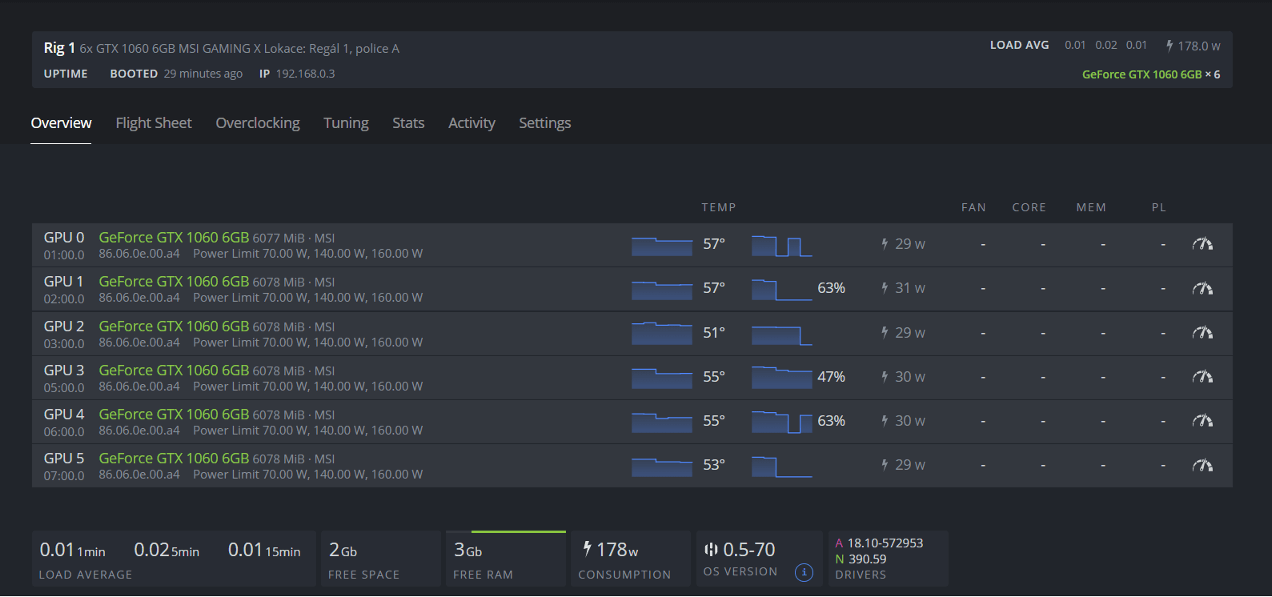
We have now sent the configuration to the rig. The rig should start mining within a few tens of seconds. So let's go to the rig tracking page (the "overview" tab) where we can observe this.
And we're mining!
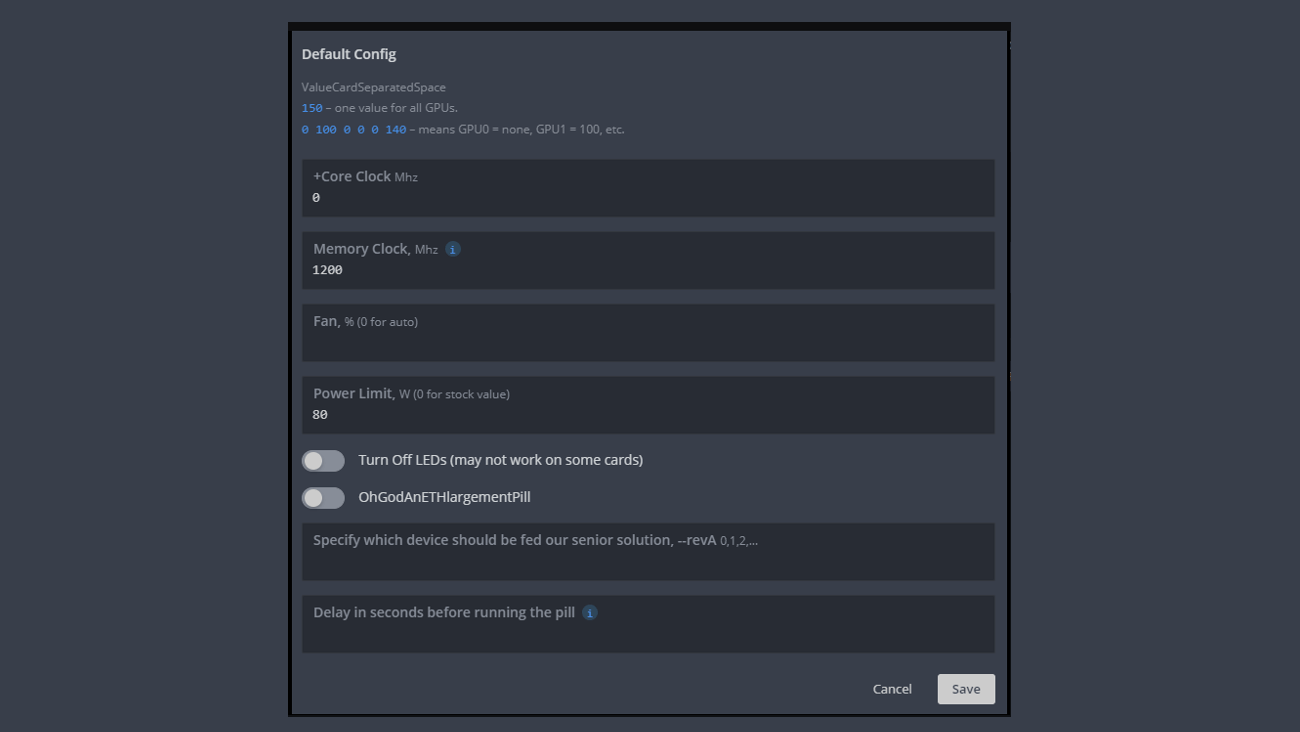
Now it's time to overclock graphics cards. Everything is very intuitive and easy to use in the "Overclocking" tab. Anyone who has ever clocked cards can handle the interface. The tool even includes functionalities that enable you to disable RGB elements on the card or to enable „ETHLargementPill“.
iYou can set the values for each card by typing as many values as you have cards in the ring, each of which can be different. For example, if my second card cannot handle a frequency of 1 200 MHz and I wanted to reduce its frequency to 1 100 MHz, the settings in Memory Clock would look like this: 1 200 1 100 1 200 1 200 1 200 1 200.
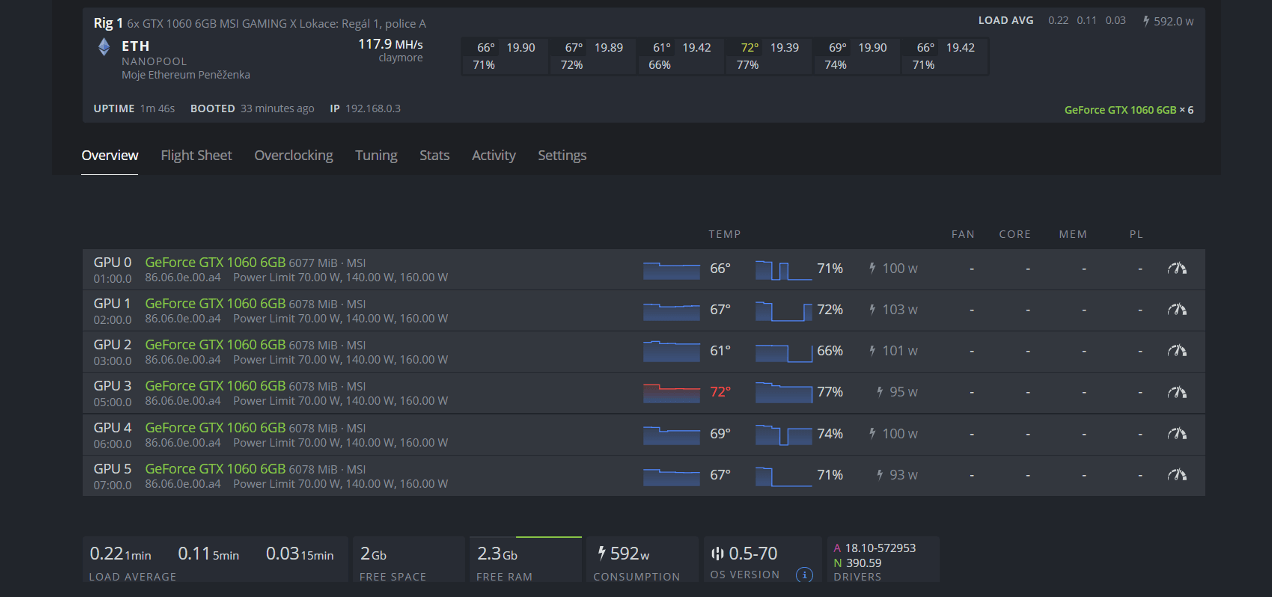
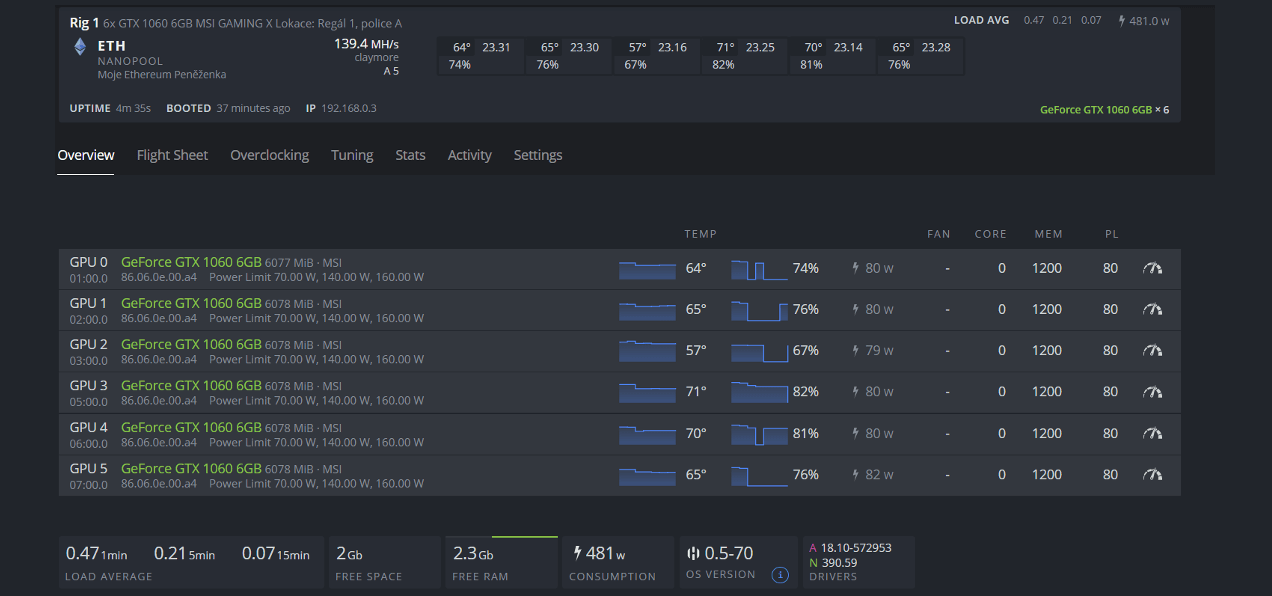
And this is what a fully tuned-up rig looks like.
HiveOS Monitoring Functions
What HiveOS is really good at is managing large numbers of devices. In the overview of all workers, it can give you detailed information as shown below. In this mode, you can fit 5 workers on a 1 920 × 1 080 screen.
Personally, I prefer a more moderated, yet very clear format, where the Full HD screen shows up to 27 workers. I use it myself along with scaling the page to 80% of its size, where I get to 33 workers at a time. Finally, if you have a really big bunch of rigs, the overview can be cut down to just the bare information where we get to 40 workers on our Full HD monitor (or 48 at 80% scaling).
Whatever view you use the HiveOS in, it will always let you know if your rig is behaving non-standardly. It can report the following errors:
GPU freeze and subsequent reboot of the rig, including saving information about which GPU failed.
An excessive number of invalid shards, including storing information about which GPU returned how many.
Below average hash rate of your rig. (The software itself will alert you if one of your rigs starts mining at a significantly lower speed than is normal for it. You will get warned after a drop in hash rate drop of at least 15% from the average)
Each of these errors has its own specific character that will be displayed in the worker overview. It is also possible to set the colour of the worker to change in the web overview after exceeding a user-defined temperature. If a large amount of the same error message occurs repeatedly, HiveOS displays a red circle next to the rig, inside which is a number indicating that amount.
Other Useful Features that HiveOS Offers
If you're new to mining and have already done some mining, you'll be familiar with terms like flashing the bios on AMD GPUs, possibly using the EthLargementPill acceleration software or even direct access to the ring via Linux SSH. HiveOS does all this too, yet intuitively and through a graphical web interface. So if you're one of those miners who's trying to get every drop of performance out of your rig, you'll appreciate these features.
iThere are multiple quality services for cryptocurrency mining besides HiveOS. An example is the Simpleminig.net mining software, whose direct application we discussed in the article How to mine cryptocurrencies with Simplemining.net (HOW TO).
A huge bonus for all larger-scale miners will also be the option for multiple accounts to access your rigs, with each account having permissions set to manipulate the rig up to a certain level. From simply tracking stats to clocking and modifying bios to authorising changes to the pay wallet and mining pool.
What Is the Price of the HiveOS Software?
As it happens in today's world, quality software is not free, especially if it is used to generate additional income. HiveOS has chosen a very interesting pricing policy:
The software is completely free for up to 3 rigs.
Starting with 4 rigs, HiveOS charges 3 USD per month per rig.
However, the fee decreases as the number of rigs increases - see table below.
Minimum number of rigs
Discount
50
10%
100
20%
250
30%
500
40%
1 000
50%
If you run a really massive number of rigs (at least 500), you will be assigned your own server by the HiveOS team to report to, as well as 24/7 phone support.
Final Evaluation of the HiveOS Tool
HiveOS is one of the software that I didn't really trust at first, but it won me over with its fast development and especially with a team of great people who really invest their time in the project. It's the perfect tool for everyone, from small-scale domestic miners to managers of giant mining centres. At the very least, I would recommend it at least for testing to all owners of mining rigs.
Kryptomenami sa zaoberám formou hobby od roku 2013. Od roku 2016 prevádzkujem vlastnú ťažobnú farmu, čítajúcu aktuálne niekoľko stoviek grafických kariet a poskytujem svoje skúsenosti ďalším firmám, ktorým som za dobu svojho pôsobenia inštaloval takmer 6 000 GPU. Aktuálne sa zameriavam na sprístupnenie ťažby všetkým, ktorí o ňu majú záujem prostredníctvom hostingu ťažobných rigov, či stavbou ťažobných fariem na kľúč.